About
–
Products
–
Close
Stage Pocket Systems
–
Vertical Pockets
Mini Stage Pocket
–
Half Stage Pocket
–
Full Stage Pocket
–
Double Wide Stage Pocket
–
Horizontal Pockets
Super Stage Pocket
–
Super Double Wide Stage Pocket
–
Speciality Partner Pockets
Pocket for Rack Mount Equipment
Pocket for Allen & Heath
Pocket for DigiCo
Pocket for Neutrik
Pocket for PreSonus
CONNECTRIX Panel Systems
ACE Panel Pro Design Tool
Stage Pocket Panels
Mini Pocket Panels
Half Size Panels
Full Size Panels
Super Pocket Panels
Rack Panels
Single Space
Two Space
Three Space
Wall Panels
Single Gang Panels
Dual Gang Panels
Triple Gang Panels
Four Gang Panels
Six Gang Panels
Back Boxes
Vertical Panel Pocket Boxes
Mini Back Boxes
Half Back Boxes
Full Back Boxes
Double Wide Back Boxes
Horizontal Panel Pocket Boxes
Super Pocket Body
Super Double Wide Pocket Body
Connectors
Connectors by Type
Audio
Data
Lighting
Video
Power
Screw Termination
Feed Through
Combo
CONNECTRIX Connectors
Audio
Data
Lighting
Video
Power
Screw Termination
Feed Through
Combo
Connectors for Custom Panels
Audio
Data
Video
Power
Combo
Stage Management Products
Choir Stick Microphones
CSM SHURE Components
CSM Audio Technica Components
Microphone Hanger Slug
Accessories
AC Isolation Kit
AC Isolation Brackets
Panel & Nesting Brackets
Lid & Bezel Solutions
Desk Top & Cover Plate
Price Guides
Close
Weight Guide
Contractor Pricing
–
Dealer Pricing
–
Contact
–
0
Home
All Pockets
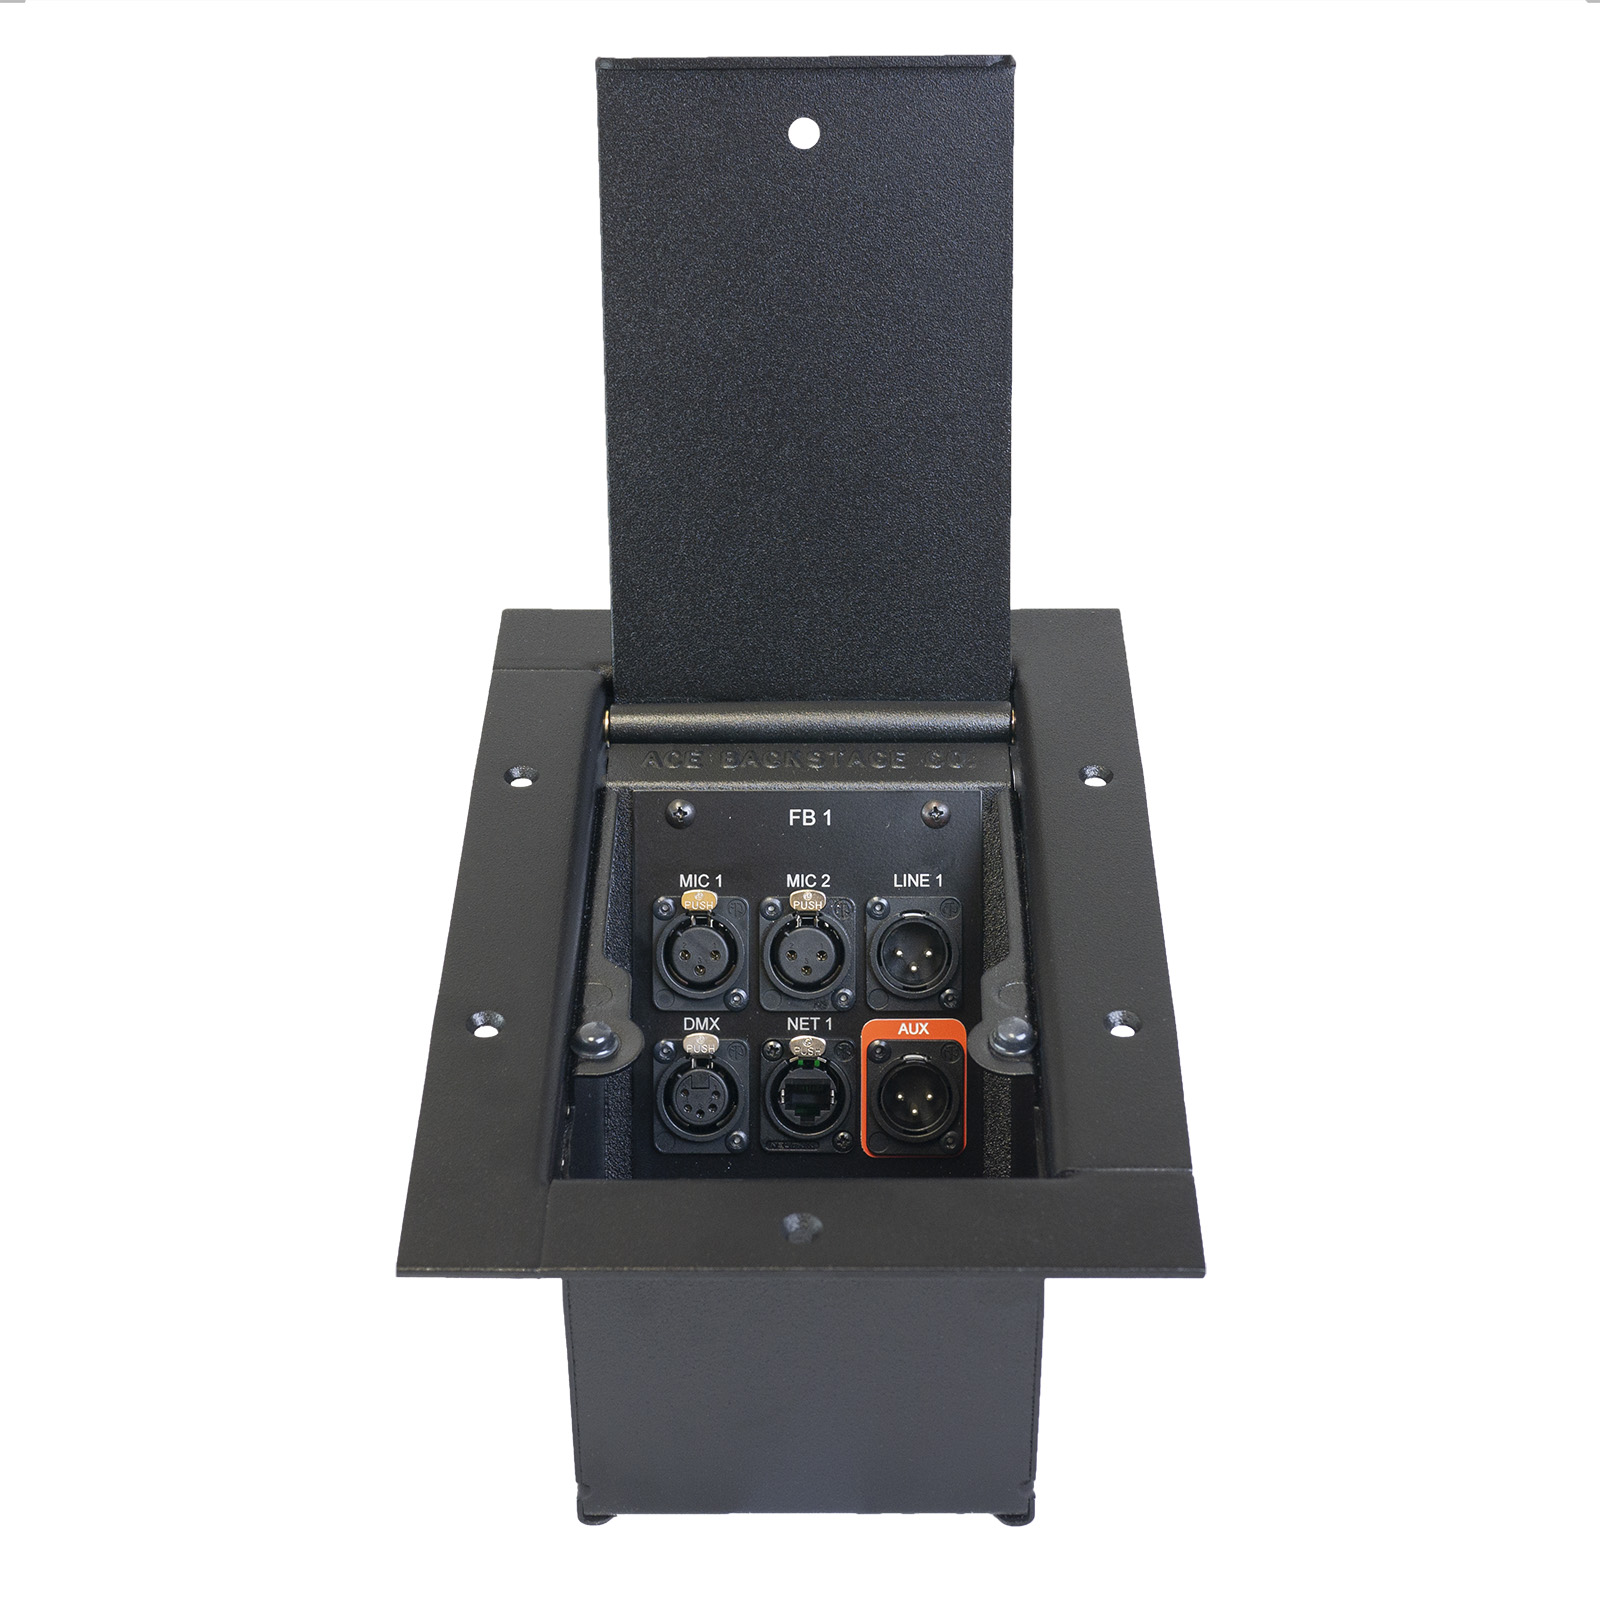
Mini Stage Pocket
Mini Stage Pocket
Finish
Choose an option
Texture Black Powdercoat
Coppervein Powdercoat
Solid Brass Flange
Solid Stainless Steel Flange
Clear
Mini Stage Pocket quantity
Add to cart
SKU:
N/A
Categories:
Vertical
,
Horizontal Panel Pockets
,
Pockets by Capicity
,
Raised Floor Installation
,
Stage Pocket Systems
,
Standard Stage Pockets
,
Standard Slant Panel
Copy to clipboard
Description
Features
Capacity:
Above Floor Dimensions:
Floor Cut Out:
Under Floor Depth:
Data Sheet
Spec Sheet
Spec Sheet DWG
Panel Load & Label Form
Install Guide
Video
Partner Product
Partner Product
Data Sheet
Spec Sheet
Spec Sheet DWG
Similar Capacity
Half Stage Pocket