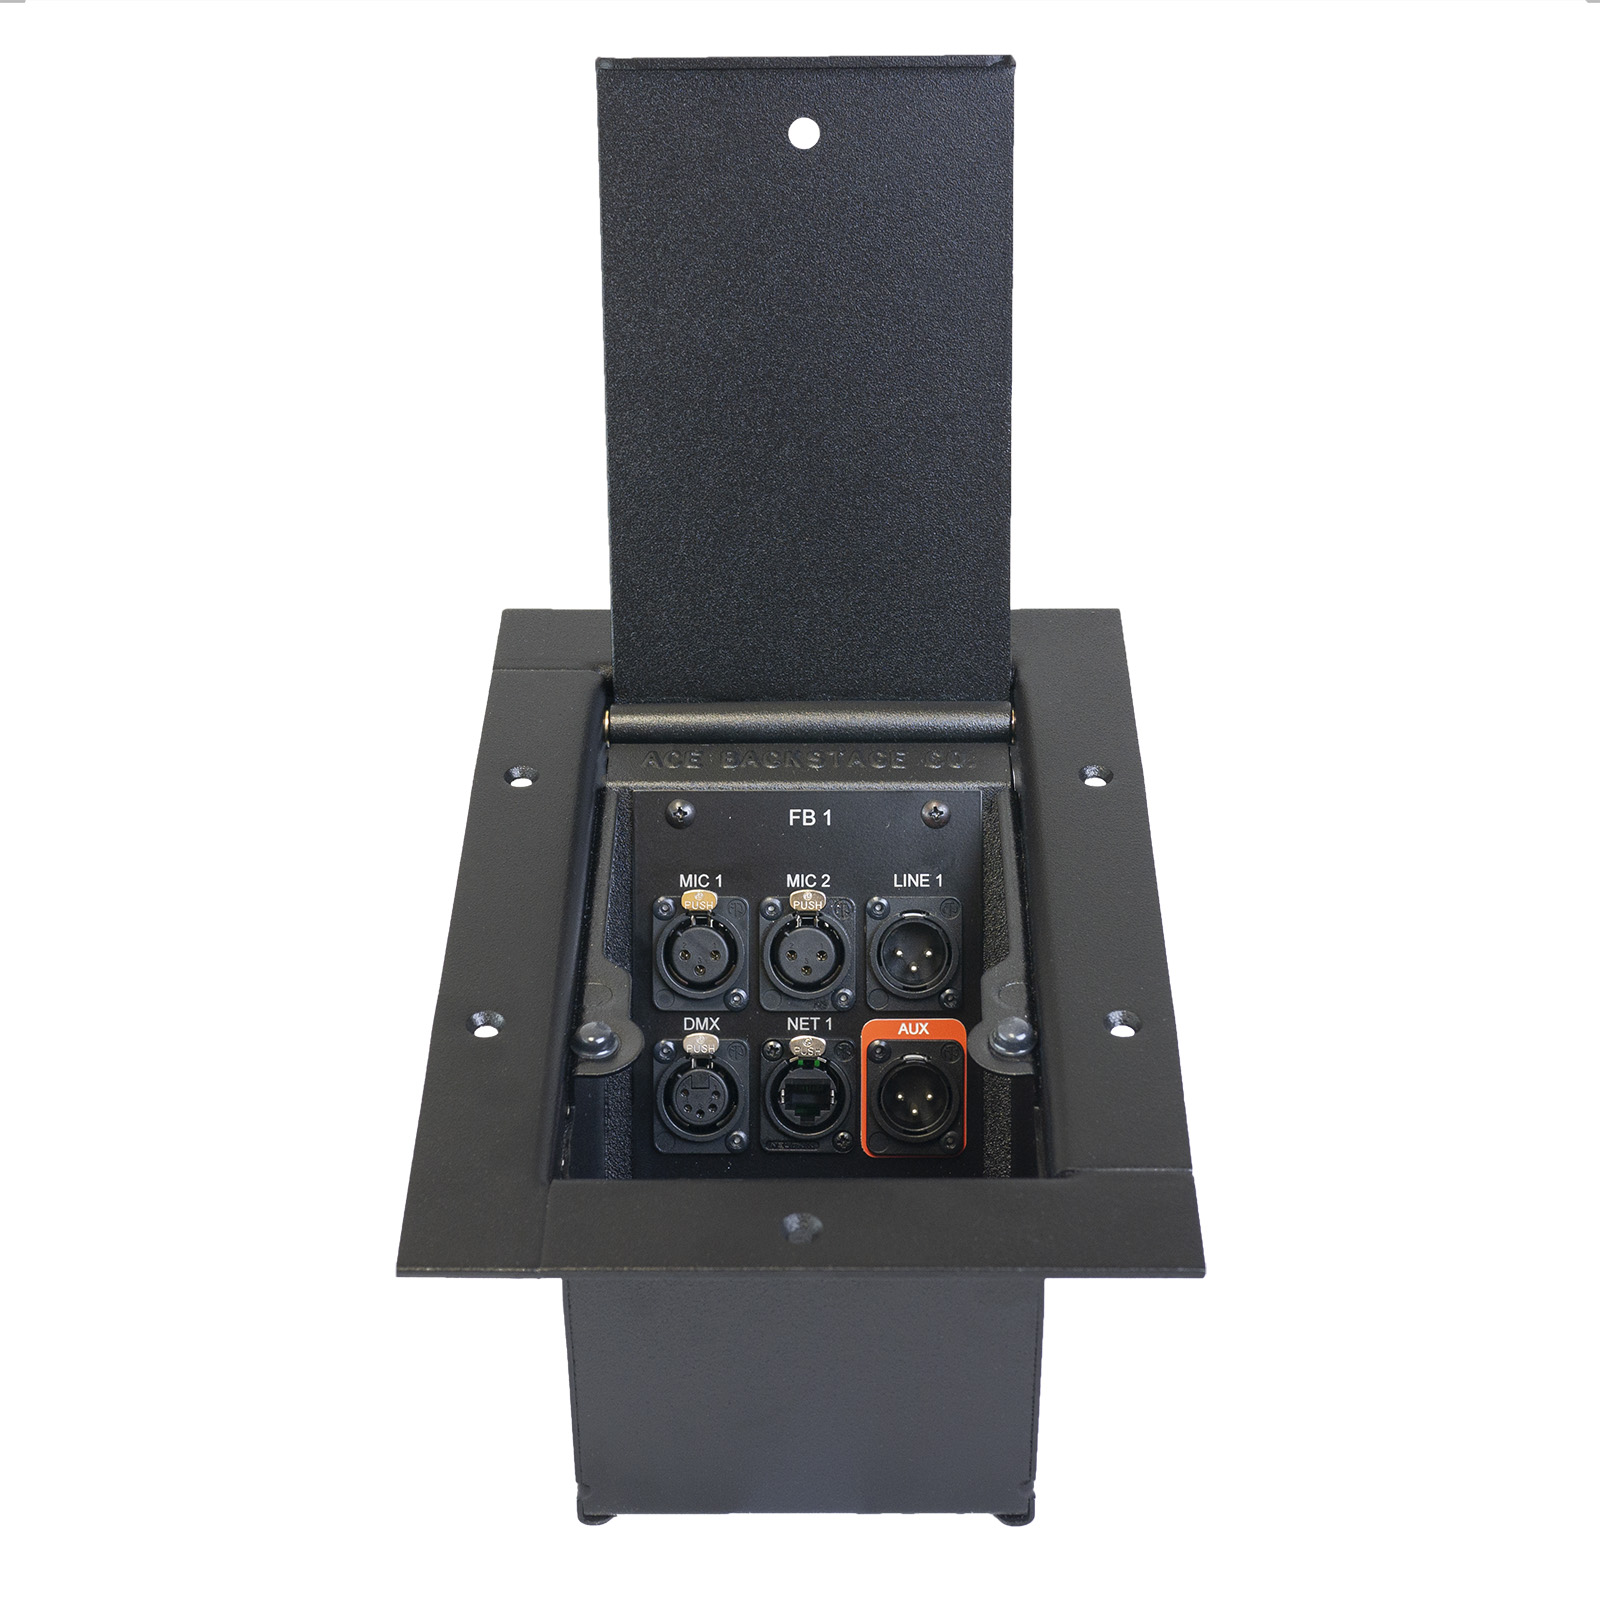
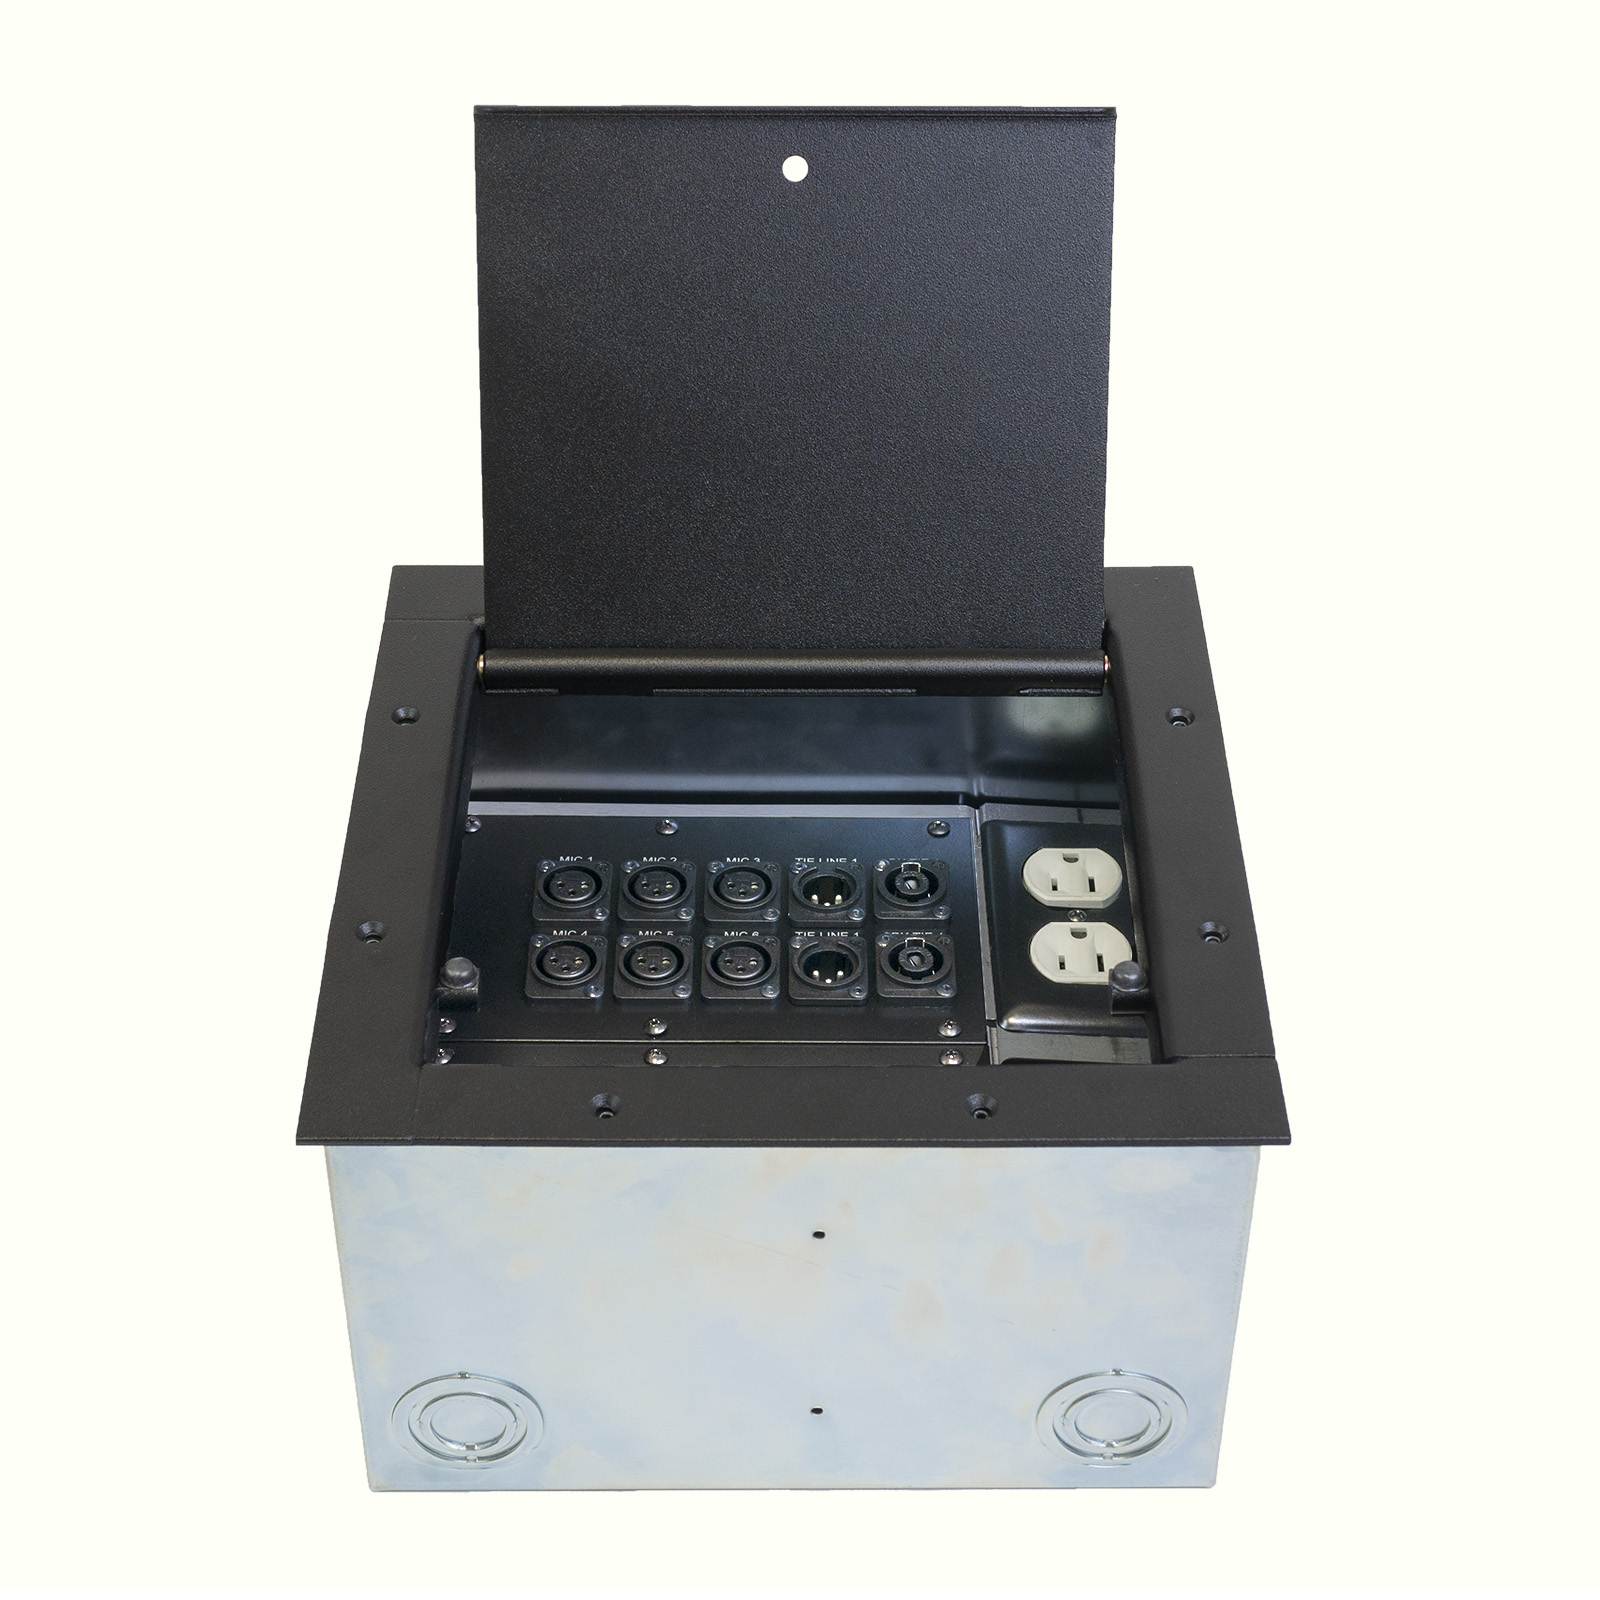
 |
 |
FULL STAGE POCKET INSTALLATION GUIDE |
 |
 |
 |
STEP 1 |
 |
 |
 |
Locate each spot where the Full pocket(s) will be installed in the carpeted floor or wood stage. Try and place the pocket between floor joists if possible. Lay the cutout for the Full Stage Pocket as follows:
FULL STAGE POCKET CUTOUT SIZE: 8.50" x 8.50". Proceed to make the cutout in the floor or stage. Note: Take extra care when cutting the square hole on a carpeted floor as the carpet piece you cutout will be glued back on to the Recessed Carpet Lid. Download the Full Stage Pocket Cutout Template. |
 |
 |
 |
STEP 2 |
 |
 |
 |
Start the process of removing the hinged lid assembly by placing the pocket on its side. With the pocket on its side locate the hinge pin. Using a small pen or small screw driver, push in the spring-loaded hinge pin and carefully remove the lid. Note: The two hinge pins are spring loaded so take care not to lose the pins and springs. Images to the left show the Full Stage Pocket on its side with the hinge pin lid assembly being removed from the pocket body. |
 |
 |
 |
STEP 3 |
 |
 |
 |
If the Full Stage Pocket will be installed with a Standard Lid (SL) then set the pocket body with the hinge pin lid assembly removed into the cutout. Secure the pocket body to the floor by screwing the (8) #8 black coated (also brass or steel) self tapping sheet metal/wood screws provided into the floor. With the open pocket body secured to the floor you can easily complete the panel/connector installation and/or other terminations. If the Full Stage Pocket is going to be installed with a Recessed Carpet Lid (CL) continue on to STEPS 5-7. |
 |
 |
 |
STEP 4 |
 |
 |
 |
After all the work in Step 3 is complete, reinstall the springs and hinge pins into the Standard Lid (SL) and snap the lid assembly into the pocket body. Note: Once the carpet or standard lid is installed it cannot be removed without first removing the pocket body from the floor. The stage pocket installation is now complete! |
 |
 |
 |
STEP 5 - CARPET LID INSTALLATION |
 |
 |
 |
When installing the stage pocket with a Recessed Carpet Lid (CL) cut the carpet out using a sharp knife and save the piece to glue onto the lid. Note: Make sure to cut the carpet out using the INSIDE dimensions of the Full Stage Pocket Body. This allows the extra "carpet slack" to be sandwiched between the carpeted floor and the Stage Pocket Trim Bezel. Carpet the Recessed Carpet Lid (CL) by trimming and gluing the carpet piece (cutout earlier) onto the carpet lid using carpet contact cement (not provided). |
 |
 |
 |
STEP 6 |
 |
 |
 |
Set the pocket body with the hinge pin lid assembly removed into the cutout. Secure the pocket body to the floor by screwing the (8) #8 black (also brass or steel) coated self tapping sheet metal/wood screws provided into the floor. Note: To avoid the screws pulling runners in the carpet, try using a hot soldering iron to burn a screw hole in the carpet before driving the bezel screws into the floor. With the open pocket body secured to the floor you can easily complete the panel/connector installation and/or other terminations. |
 |
 |
 |
STEP 7 |
 |
 |
 |
After all the work in Steps 5 and 6 is complete, reinstall the springs and hinge pins into the Recessed Carpet Lid (CL) and snap the lid assembly into the pocket body. Note: Once the carpet or standard lid is installed it cannot be removed without first removing the pocket body from the floor. The stage pocket installation is now complete! |
 |